Self-Drafted DIY Ankara Dress

“……….They will be called oaks of righteousness, a planting of the Lord for the display of his splendor.” Isaiah 61:3

Hey all!

How are you? It has been a minute since i’ve last blogged. I had such an amazing quarantine spring and summer experience. My business started to blossom again with a few wedding commissions. I enjoyed it. However, with the exception of today’s look, it made it difficult for me to find time to sew for myself let alone blog. Today’s look is a DIY dress that I made in July. It is self drafted. I pulled out my foundation patterns that I drafted back in design school and started putting my pattern making skills to work. The inspiration for this dress actually came from a vintage 70s DIY self drafted pattern that I’ve looked over time and again on Pinterest. Below is a picture of the inspiration piece. I felt inspired by the fabric to make something with a very earth mama vibe to it. 70’s is all about the earth mama vibes and this pattern seemed to fit the bill.

I actually made it to go to church. Our church was in service at a limited capacity in person for a short time in July. I love to wear dresses to church and I could see myself praising God in it. However, sadly I didn’t respond to the RSVP in time and missed the opportunity to go in person. Hence the dress has been hanging in my sewing room. Until today. I decided that I was going to have an impromptu photo shoot and share it with you all virtually.

I love the way it feels on my body. It fits nicely, and the cotton is soft and smooth. If feels like velvet on my skin. I call it my goddess dress because I feel very divine, pretty and powerful wearing it. I kept accessories to a minimum. Just my favorite go to gold hoops. For the shoot I stayed barefoot. It seemed very appropriate.

Not a whole lot of chat about how I made this dress. Just an opportunity to dance and smile in front of the camera and share my work.

Photo Credits: Asabea Christian (aka my daughter)

DIY Kimono using New Look 6217

My main inspiration for this make was about pushing myself to sew with more challenging fabrics.

“There is a time for everything,
    and a season for every activity under the heavens:”

Ecclesiastes 3:1 (NIV)

Hello Lovelies!

I pray that everyone is safe and healthy. That seems to be the recurring message that i’ve been hearing just about everywhere that I go these days. The truth of the matter is that we are all handling quarantine life in our own unique ways. I’m a bit of an introvert myself and I actually enjoy being in my home, but even still I’ve had to make some adjustments to my schedule now that my kids are home with me during the day. It took me a couple of weeks to adjust to our current season, but, thankfully I finally settled into this quarantine life.

This week’s blog post is short and sweet. I didn’t think I was going to photograph this make. but I woke up this morning and the weather was a glorious 70 degrees today in Wisconsin and I couldn’t resist the temptation to play with my new camera. The camera was my Christmas gift to myself. I have been wanting to step up my blogging game with better quality photos and I researched all of the camera options out there. I knew I wanted a DSLR camera but didn’t really have the $400+ budget for the super fancy cameras that a lot of bloggers recommend. Instead I chose the Cannon Power shot SX530 HS it was half the price of the Cannon DSLR 6 but still had the kind of picture quality that I was looking for. I think its a higher quality point and shoot camera, that has includes some of the fancy features of the more expensive cameras. All of the reviews said that this was a nice entry level camera. Sometimes you have to give yourself room to upgrade.

So here is my kimono using New Look 6217. I’ve had this pattern and fabric in my stash for quite some time. My main inspiration for this make was about pushing myself to sew with more challenging fabrics. You know fabrics like silk, charmeuse, chiffon, etc. I liked the idea of a kimono as the silhouette was easy leaving me room to focus on properly handling the fabric. It was not hard at all. Especially using my industrial machine. I’ve been sewing with a Juki straight stitch machine since about 2015. I love! love! love! my sewing machine. She is my ride or die and outside of needing a serger for finishing and my home sewing machine for buttonholes and hemming my knit projects. She is all I need.

The pattern is straight forward to use and I chose to add a little extra flare by sewing a fringe trim at both the bottom and sleeve hem. The other thing that I did was to ditch the pattern facing in favor of creating a band to finish the front neckline using a silky black polyester fabric that I purchased from Joann fabric.

Initially, I didn’t think that this kimono was my style, but a quick trip to my closet and I had coordinated a couple of looks for both day and even a cute night look. You know for when we can go back to living a normal life. lol! The colors of the kimono even inspired me to create a make-up palette for the shoot.

This week’s photo shoot is courtesy of my beautiful daughter Princess Asabea. She turned 15 this year ya’ll. She is such a quiet and powerful force that God used me to birth into the universe. I’m grateful for her. She has so much patience for me ( I can be bossy at times).

Well that’s all for now. Until next time …………!

DIY Wrap Dress Using New Look 6581

As for this week’s post. I made New Look pattern 6581. This is such a great make. It’s easy and straight forward.

“Since you are my rock and my fortress, for the sake of your name lead and guide me.” Psalm 31:3 (NIV)

Hello Lovelies!

As we are finally approaching the end of winter, I appropriately scheduled this week’s post as my last winter make. As the weather is starting to warm up and daylight savings has already made its mark, I’ve started to crave  spring. I’ve even started a few spring makes and I can’t wait to share them with you.

The weather and my wardrobe aren’t the only things shifting. I’ve also been steadily working behind the scenes working out some changes to the blog.  I’ll be making some announcements in the coming weeks so stay tuned!

What I can share with you in greater detail today is my new website. I’ve been trying to figure out how to best bring together everything that I do under one website. I spent quite a bit of time working out logos, web hosting sites, domain names etc. and finally at the beginning of 2020 things started to fall into place.  I’m still tweaking things but overall I’m happy with what I have. You can check it out Here.

As for this week’s post. I made New Look pattern 6581. This is such a great make. It’s easy and straight forward. I made both the dress view A  and the pants view C. Wearing a head to toe pant set made from the same fabric is a bit over the top for me. I tend to like to mix and match things. However, I didn’t mind the finished look of the pant set.  It was a definite style change for me. but I definitely prefer wearing the dress separately.  

The fabric that I used was a mid-weight stable knit.  I bought it on super clearance from Joann’s back around Christmas.  I think I paid $18 for about 5 yards of fabric.  Its very warm as well, which is what I wanted for a winter dress.  

As I mentioned earlier this make was a pretty straight forward pattern.  The only design change that I made was to turn the straight sleeve into a bishop sleeve.  The other changes were for fit.  I did the following to adjust my pattern to fit my body:

  1. Shortened the bodice by 1inch to accommodate my short waist
  2. Increased the back rise of the pants by 3 inches to accommodate my fuller backside and shortened the front 3 inches as I do not carry a lot of weight around my stomach.
  3. The last thing that I did was to change the way that I finished my wrap neckline. I’ll go into a little detail about why below and then talk about how I did it.

The biggest reason I changed the way that I finished the neckline is because I don’t like the way commercial patterns finish knit wrap necklines.  They often tell you to either a) use woven bias tape or b) include a facing and instruct sewers to apply fusible interfacing.  I don’t like either of these methods because they both restrict the stretch of the fabric at the neckline.  While the neckline does need to be stabilized you still need the stretch in the fabric.  It’s the stretch that helps the fabric to mold around the curves of the bust and neck area on the body.  Without it you will have gaping.  

So I sought out to find a way to finish the neckline.  I could have approached it by using a knit bias tape but I opted not to do that as I didn’t really feel like cutting bias strips.  Instead I did the following:

  1. I used the facing pattern piece and cut it in the same fashion fabric as my dress.  I did not add interfacing as a stabilizer for the neckline.
  2. Instead. I sewed 3/8″ wide clear elastic to the neckline by sandwiching it in between the dress and facing along the neckline seam.  
  3. I finished the neckline facing by top stitching the facing down using my twin needle.
  4. I neatened up the facing by trimming back the excess facing fabric along the zig zag stitches.
  5. I smiled at how well my experiment turned out.

Overall I was happy with my results. I still had a bit of gaping at the neckline but that is because I needed to shorten the neckline a bit more to accommodate my small bust line. I opted to sew in a small snap closure to help keep the neckline from gaping.

I also think that If I used a different fabric that I could go without clear elastic.  This fabric was okay for this project but is better suited for knit pajamas or a lightweight sweatshirt and would respond better to ribbed knit trim finish.  I also might be overthinking it.  

As for styling.  You know me I keep it simple.  I layered the dress with this great light weight knit turtleneck and some statement earrings. I captured photos of me in both the pant set and as a dress worn with my black suede stiletto heeled boots.  Chic meets comfort in this outfit. Not to mention warm.  

Well that’s all for now. Until next time ……!

Little Black Dress circa 1970 Using McCalls 7802

I’ve begun to pray daily for the wisdom to make choices that help me to remain consistent in the face of pressure.

“But the wisdom that comes from heaven is first of all pure; then peace-loving, considerate, submissive, full of mercy and good fruit, impartial and sincere.” James 3:17 (NIV)

Hello Lovelies!

It’s another great week in Milwaukee, WI! Despite the drop in temperature and a few snow days, the sunshine has returned and overall the winter here has been mild. I’ll take it.

These last few weeks have been a little pressing as life as a single mom has been a bit hectic, but I am super grateful because this year I feel like God is really helping me to find balance through greater organization and self-care. I went back on my ketogenic diet plan. I talked a little bit about it on my Instagram stories earlier this week. I was pretty quiet about my keto journey and really didn’t talk about it to anyone outside of my immediate friend circle until earlier this week on my Instagram stories. I started my keto journey last year around the beginning of January and was pretty faithful to it. I lost about 20 pounds in 6 months. I’m still trying to get rid of at least another 30 pounds but I’m not in a rush.

I’m approaching this as a life style change. I’ve struggled with weight, food addiction and eating disorders my entire life. I’m at a point now where i’m exhausted and I just want to be healthy and balanced. Keto has helped me keep the inflammation in my body down, keep my sugar cravings in check and overall has blessed me with the energy that I need to keep up with my life . I started to make more time for the gym again and even joined my son’s Tae Kwon Do class to help with stress management.

It hasn’t been easy but God has been really showing me that life is about choices. I’ve begun to pray daily for the wisdom to make choices that help me to remain consistent in the face of pressure. The result is an Iris who frowns and complains less and trusts God and smiles more.

Which leads me to this week’s post. I smiled a lot while sewing this dress. I love, love, love vintage! I even have 2 great Pinterest boards for anyone who loves vintage that you can follow here and here . One is dedicated to vintage designer garments and another one is dedicated to vintage sewing patterns. Both are organized by decade so its easy to find the inspiration that your looking for.

Actually Mount Mary University has a great Archive dress collection that is so amazing! Some dresses date back to the late 1800’s. My draping class is making a visit on Monday to find inspiration for their final projects. I love going in there.

The inspiration for my came from 1970’s London Designer Label Biba. I love the aesthetic of Biba, Halston and DVF. Simple, elegant, and pretty. Below is an image of my inspiration.

I started with Mccall’s M7802 view b and the only modifications that I made to the pattern was to use an a-line flare skirt from another pattern that didn’t have the princess lines and I slashed and spread and raised the sleeve cap in order to create the fullness at the shoulder. I used a moderate stretch crepe knit fabric that was fantastic for this project. It was easy to work with and had enough body to give the sleeves the structure that it needed to hold its shape. The only change I would make in the future is to add an invisible zipper to the back. The stretch knit isn’t that stretchy and a zipper would make it a little easier to get in and out of. Otherwise this is a super comfy dress to wear. I styled it very simply with a pair of nude colored platform peep toed platform stilettos and boho inspired earrings in a similar color as my shoes.

I can’t wait for the weather to warm up so that I can wear this dress. I love the way it looks with a natural leg showing. It’s a versatile LBD that I think could be worn to a church, a wedding or a cocktail party.

Well thats all for now! Until next time…..

DIY Knit Dress Using McCalls 7999

Therefore, since we are surrounded by such a great cloud of witnesses, let us throw off everything that hinders and the sin that so easily entangles. And let us run with perseverance the race marked out for us, fixing our eyes on Jesus, the pioneer and perfecter of faith.……” Hebrews 12:1-2 (NIV)

Hello Everyone!

It is my sincerest hope that you all have been approaching your new year with great expectation and a zeal to chase after your dreams. I’m super proud of myself as I walked into 2020 with a revived sense of purpose and a desire to approach each day focused and excited for where God is taking me. It hasn’t been easy and I had to make some life changes.

For one. I gave up coffee and sugar again and I feel so much better. I was developing a nasty caffeine addiction. I’ve given it up in the past but end up right back on the sauce. While I love my morning cup of coffee, I was using caffeine to give me energy so that I could get through my busy schedule. The caffeine and sugar highs were making it hard for me to focus, my stomach started to become bloated and I was starting to have mood swings.

So when my church went on our annual fast at the beginning of January and the list called for us to cut caffeine and sugar from our diet; I knew it was a help line from heaven to make the change I needed.

I did it gradually, but after 3 weeks, I knew I was in a good place. My mind is more focused and my body’s nervous system has quieted down. I feel less anxious. I’ve re-worked my schedule so that I’m not constantly running. If i’m feeling overwhelmed by teaching, business, ministry and family responsibilities, I take a small break on my light days. Even if it means taking a short nap. I started walking even in the cold weather. This year the winter has been mild. Our days have consistently been around 30 degrees. I bundle up real good and walk for 45 minutes. The walk gives me the boost I need but it also has done wonders to keep the winter blues away.

I’m super grateful for the shift. I am definitely finding my version of balance.

As for this week’s post. This is a long overdue review of McCalls 7999 view C. I made this dress back in November. I’ve worn it several times already and I even put out a sneak peak pic on my Instagram page last month. I’m just keeping it real with you all. (lol!) I looooooove! this pattern. This was such an easy make. I had the pattern cut, made a short waist adjustment and sewn within 2 hours. I sewed the entire dress with the exception of the collar using the flat construction method on my serger. I love flat construction when it makes sense to use it. Especially when sewing knits on my serger. It speeds things up as you sew and finish your edges at the same time.

The pattern is straight forward and beginner friendly. There are only 4 pattern pieces and I cut it for a size Large. My short waist adjustment and taking out another 1 inch of ease at the waist was the only fit adjustments that I needed to make. I used a medium weight moderate stretch knit. from Joann Fabrics. It was on a 70% off clearance corner. I think I paid a total of $12 for about 3 yards of fabric.

I love it because it’s warm and all I need is to put on some control top black tights for shaping, smoothing and extra warmth underneath. I decided to keep it on a street style vibe and wore my black patent leather platform oxfords and statement earrings. I’ve also worn it with a black leatherette jacket to add a little bit of interest and layering for colder weather.

Well… that’s all for now! Until the next time.

2019: My Life In Review

and provide for those who grieve in Zion— to bestow on them a crown of beauty instead of ashes, the oil of joy instead of mourning, and a garment of praise instead of a spirit of despair. They will be called oaks of righteousness, a planting of the Lord for the display of his splendor.” Isaiah 61:3 (NIV)

Hello Everyone!

After watching everyone post their top (9) 2019 posts on Instagram; I felt inspired to go ahead and post my own 2019 makes in review. Truthfully, 2019 has been a year of closure for me on many levels. The last decade has been filled with so many ups and downs.

The birth of my second child in 2010, followed by my marital split and moving in with my parents in 2012. The divorce in 2014, My many business successes and failures, purchasing my first car in my name in 2015 (my ex-husband bought my previous car), graduating from Fashion Design School in 2017, purchasing my first house, my second car and blog launch in 2018. Lets not forget landing my dream teaching job in 2019 at Mount Mary University. Not to mention the enormous level of personal and spiritual growth that i’ve gained over the years. Let’s just say, that I have definitely been living my life.

I don’t think that I intentionally, approached 2019 with a plan for closure. Instead, I found myself in places where I had to deal with some unresolved issues that were hindering my growth as a woman with purpose. The low self-esteem and body image issues, the fear and anxiety about being a single parent, the anger and unresolved feelings towards my ex-husband are just a few things that I had to come to terms with. I believe that God opened the door for me to look at my life in review. In those candid moments I was able to mostly pray and journal about it. Coupled by a few spiritually healthy people who lent an ear and prayer to me. Little by little I found myself getting free.

Even my confidence as a sewer, designer and instructor grew. What I love about my makes this year is that I found myself willing to experiment. To work through the sewing and design process. As the year progressed, I could feel not only my spirit getting free, but my design process became less cluttered. It is becoming easier for me to express myself creatively. Even when I make something that I don’t initially like, I still find a way to wear it. Which is liberating. Before i’d get down on myself about it, toss it or give it away. I even purged my fabric stash. I used what I liked and donated what didn’t work. I started to buy only when I had a clear vision in mind. Even my recent fabric haul at Joann fabrics was purposed. I had a clear idea of what I wanted to make with everything that I bought.

So what can you expect to see from me in 2020….? I see this new decade as a great new beginning for me and my family. You can expect to see the fruit of all that is new coming into my life. I know that sounds incredibly vague and deep at the same time (lol!). In all seriousness though, I am still planning out the details, but its the truth. I believe there is so much greatness getting ready to penetrate my life that i’m going to be able to share it with everyone that God connects me to.

What about you all…..? What was 2019 like for you? What are you most looking forward to in 2020….? I would love to hear about it and be in prayer with you. I wish God’s greatest blessings for you all in 2020. Happy New Year!

Until next time……..

DIY Velvet Asymmetric Tunic Using Vogue V9308

“I will exalt you, my God the King; I will praise your name for ever and ever.” 

                                                                                                Psalm 145:1

Hey Everyone!

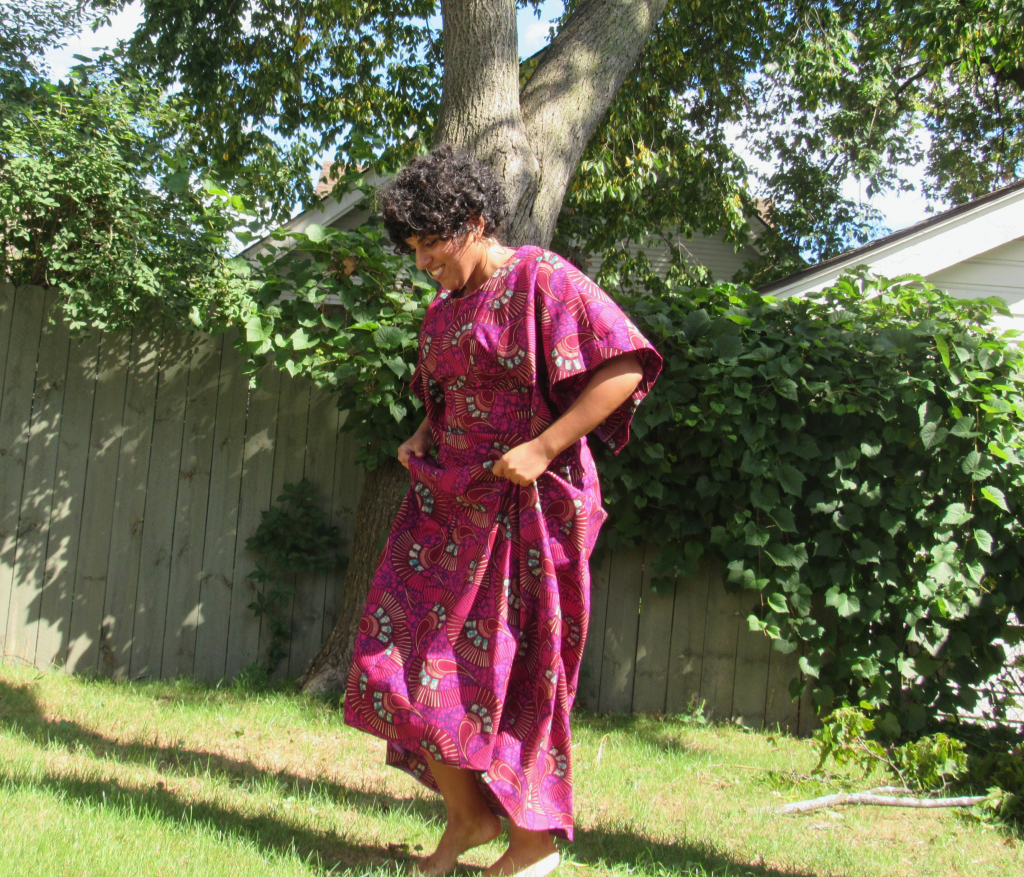
Ever wonder where velvet comes from? or what velvet burnout is?  Having made 3 projects for this month’s posts from stretch velvet; I began to think back to design school and my textiles class.  Out of all my design courses.  Textiles was the only lecture based class.  For a creative applied learner like myself and many other creatives, this at times felt like torture.  Thankfully my professor thought so too.  She did her best to incorporate hands on learning.

It was actually a very informative class where we learned so much about how fabrics are made.  And where the fibers for the yarns that are used for weaving our fabrics come from.  Like did you know that polyester is a petroleum based fiber?  It starts out as a liquid and then is transformed by heat into the thread and yarns used to weave the actual fabric. Or did you know that rayon although it is a synthetic fabric is created by using chopped up natural fibers as its base?  Thats why it drapes so well and is more comfortable to wear than other synthetic based fibers.

Which leads me back to my original question.  What is velvet? and what is velvet burnout?  The top that I am wearing in today’s post is a cheetah print made of a stretch velvet burnout.

What is velvet?

Velvet is a soft, luxurious fabric that is characterized by a dense pile of evenly cut fibers that have a smooth nap. Velvet has a beautiful drape and a unique soft and shiny appearance due to the characteristics of the short pile fibers.

How is velvet made?

Velvet is made on a special loom known as a double cloth, which produces two pieces of velvet simultaneously. Velvet is characterized by its even pile height, which is usually less than half a centimeter.

Velvet today is usually made from synthetic and natural fibers, but it was originally made from silk. Pure silk velvet is rare today, as it’s extremely expensive. Most velvet that is marketed as silk velvet combines both silk and rayon. Synthetic velvet can be made from polyester, nylon, viscose, or rayon.

There are several different velvet fabric types, as the fabric can be woven from a variety of different materials using a variety of methods. They are crushed velvet, panne velvet, embossed velvet, ciselé, plain velvet, stretch velvet, pile on pile velvet, and velvet burnout just to list a few.

There is also something called velour which is a knitted fabric made from cotton and polyester that resembles velvet. It has more stretch than velvet and is great for dance and sports clothes, particularly leotards and tracksuits.

For all of my projects I used a stretch velvet, that I think run more along the line of velour than true stretch velvet.  As they are super stretch and the pile of the fabric are shorter than a true velvet.

What is velvet burnout?

This week’s post was made from a stretch velvet burnout that I purchased from Joann Fabric.  Burnout also called Devoré is a fabric technique particularly used on velvets, where a mixed-fibre material undergoes a chemical process to dissolve the cellulose fibers to create a semi-transparent pattern against more solidly woven fabric. For example: If a velvet is made from a blend of polyester (synthetic) and cotton (cellulose), they will use a chemical treatment to disolve the cotton fibers in order to create the fabric’s pattern.

I’m not a huge fan of burnout fabric, but I do love the rich colors that they come in.  On the fabric that I used for the top that I made for today’s post; you can see that the cheetah pattern was created with a cream colored velvet.  The background is a brown stretch knit.  If you scroll down you can see the inside of my garment in one of my pictures.  Where the inside is solid brown color.  But the top side of the fabric is two toned.

Pretty cool! Don’t you think?

For today’s look I used Vogue 9308.  I love this pattern quite a bit.  I was inspired by many of my sew sister’s who made this pattern as is from sweater knit, and some from linen and cotton.  All of them looked great and some even belted it to give them shaping through the waist.  However, I was afraid that the original design would overtake my short frame.  I’m only 5’4″ and I have wide hips.  Too much fabric will overwhelm my figure and I knew that I didn’t want to belt this top. So altered the hemline.  I also converted the bell sleeve into a bishop sleeve by gathering the sleeve hem into a self-drafted stretch wrist cuff.  The last thing I did was raise the front neckline a bit and gathered the excess neck ease into a mock turtleneck collar that I took from another pattern.

Hemming this was easy peasy.  I just used double sided tape to hold the hem in place and top stitched using a twin needle.

This top made in velvet is quite luxurious and worn with a pair of palazzo pants would create a chic look, that could be worn to a fashion show, church, or a wedding.  I knew that I wanted to be able to wear this top in my everyday life or to teach at the university.  So I styled it with a pair of skinny jeans, brown pointed toe suede booties, Some pretty oversized gold hoops and that’s it.  Simple elegance.

Well that’s all for now.  Thanks for reading. Be sure to tune in next week as I spend some time sharing a few tips that I learned while sewing all of this stretch velvet (velour). Until next time….!

blog signature


DIY knit Velvet top using McCalls M7722

“With all humility [forsaking self-righteousness], and gentleness [maintaining self-control], with patience, bearing with one another in [unselfish] love. Make every effort to keep the oneness of the Spirit in the bond of peace [each individual working together to make the whole successful].”

Ephesians 4:2-3

Hey Everyone!

I’m back! I thought I was just taking off August but life decided differently. Teaching 2 university design courses on top of family and ministry responsibilities was way more than I thought it was going to be.

I finally found a moment to catch my breath and re-work my schedule to include blogging again. The great thing is that I still have been able to find some sewing time at least 1-2 days a week. Woohoo! Sewing is my therapy.

This week’s make is one of a series of velvet knit tops that I’ve made this fall. I didn’t intentionally plan it that way. It was based more on fabric selection at my local Joann store. I will say this though. I used to hate sewing with knits. And 3 -4 knit shirt projects in and I’m over it! I absolutely love sewing with knits now!

For this top I used McCall’s 7722 view C. I hacked this pattern last year for my asymmetric peplum top w/ tutorial.

This was an easy straight forward pattern that didn’t require much fitting. However I lost about 20 pounds since the last time I made this top and I needed to take it in at the side seam and hip.

What I didn’t do on this project but did make the modification for the next time I make it, was to shorten at the waist. I’m short waisted and there was some bagging around my waist line at both front and back. I fixed most of it by taking in the waist at the side seams. Only because I had cut into the fabric before I realized it. Overall I’m happy with the fit.

The only design modification that I made was to turn the neckline into a mock turtleneck by raising the neckline a little bit and using a collar from another knit top pattern that I had.

I styled this top with a pair of black fitted straight leg pants, black pumps and a pair of bold yellow earrings. I love this pairing as it’s figure flattering and allows the top to shine.

Well that’s all for now. Until next time….

DIY Summer Dress Using Tabitha Sewer’s LenaHorne Dress Pattern

This week’s post is my version of the #lenahornedress from Tabitha Sewer

“So now, do not be afraid; I will provide for you and support you and your little ones.” So he comforted them [giving them encouragement and hope] and spoke [with kindness] to their hearts.” Genesis 50:21(amp)

Hey Y’all!

How’s it going? I’ve been suuuper chill these days! After a busy June and July, I finally have some down time. I’ve been casually taking care of some house work, engaging in some sewing, hanging out with friends, about to start a little fall planning. But I really feel like I’m in a season of relaxation. So I’ve been doing these things at a chill pace. How about you all….? How has your summer been?

This week’s post is my version of the #lenahornedress from Tabitha Sewer I was sew lucky to have won this pattern along with a whole bunch of sewing goodies from D&H fabric Co.’s  one year anniversary give away. I mean seeeeewwww much was in there! From fabric to sewing notions, earrings and even a DIY shoe kit from A Happy Stitch. I’ll be sharing what I make with these gifts over the next few weeks. Stay tuned!

So like I was saying…. The lenahorne dress pattern from Tabitha Sewer was one of my gifts and I decided to do my own version of it and share some of my thoughts on this pattern.

Pattern Review

The pattern instructions were very straight forward and easy to follow. I liked the method of construction that she used to sew the dress together. In particular the zipper insertion to the lined bodice was great! No need for hand finishing. It was completely inserted by machine. Which was such a time saver!

I like that she uses ready to wear measurements and sizing making it so easy for sewers to choose their correct size. I also liked the inclusivity of her pattern sizing. Sizes start at a 0 and range to a 24.

Fit and Design Modifications

The pattern for me fit true to size.  I am a ready to wear size 14 and I cut a pattern size 14 and it fit perfectly.  The only adjustment that I had to make was in the high bust. I had to pinch about 1″ out at the princess seams.

I’m not such a ruffles kind of girl so I opted to leave out the ruffle detail opting for straps that tie at the shoulders. For the shoulder straps I simply used the straps that were included in the pattern and cut an extra set of 2.  The other change that I made was in the skirt. I lengthened the hem by creating a peplum. Below are some brief instructions for how I created the peplum.

1) I traced view B of the dress’ skirt pattern (it reaches above the knee) to a separate sheet of pattern paper. (you can use butcher paper, tracing paper, tape printing paper together or even newspaper if you don’t have pattern paper).

2) I marked a series of lines 2-3 inches apart along the length of the skirt pattern.  Then using the slash and spread method I cut along the lines from the bottom all the way to but not through the top of each line. Leaving a hinge at the top to spread the pattern.

3) I then placed another large piece of pattern paper underneath the now slashed skirt pattern.  Evenly spreading and taping each slashed area to the paper underneath. This gave me the fullness only at the hem. I didn’t want a ruffled hem. I wanted a peplum.

4) Lastly, I remarked the hemline and cut the new pattern piece.

Fabric and Styling

I was on a tight budget this time around and I wanted to make a casual dress that I could wear in the hot summer August days ahead.  So I shopped the clearance shelves at Joann’s and found this shades of blue batik fabric that has a hint of purple and aqua running through it.  I broke up the print and created contrast by using a solid cobalt blue for the back bodice and straps.

I kept styling minimal with these aqua colored flip flops and shell earrings that picked up the blue and purple tones in the dress.  Another fun styling option would be to accessorize with pops of yellow with shoes and fun boho vibe earrings.

This was a fun impromptu shoot.  I was hanging out with one of my besties in Downtown Milwaukee at the Public Market.  We had lunch, chatted the afternoon away and decided to walk and take a bunch of selfies.  Before we knew it people were coming up to us asking if we wanted assistance taking pictures.  It was so nice to witness and receive kindness.

img_4598

img_4606

Well thats all for now everyone!  Until next time…..!

blog signature


Sew Easy Summer Pattern Round Up

“In your relationships with one another, have the same mindset as Christ Jesus:” Philippians 2:5

Hey Everyone!

How are you?  Any special 4th of July plans?  I wish I was one of those people that gets into holiday sewing.  I always admire folks who take the time to make a red,white and blue kind of sewing project.  Or costume sew for Halloween. or make matching christmas pajamas for their kids.  Thats just not my thing. lol!

I am looking forward to the 4th of July holiday though.  My kids are away with their dad but my brother and his family are flying in from Arizona.  I am really looking forward to spending sometime with my nieces and nephews.

This week’s post is a Sew Easy Summer Sewing Pattern Round UP.  Like I mentioned when I announced this series I was looking to sew projects that had minimal pattern pieces (5 or less), no zipper or button closures.  Pretty much anything that I can pull up or pull over my head.  I also thought some of you might be feeling kind of craft lazy this summer also and would like to keep sewing projects laid back and easy.  Below is a list of what I pulled from the latest spring/summer collections from the Big 3 as well as a few indy patterns companies.

The Patterns

The Big 3 Companies

Vogue

V9374 Pull on Pants

V9375 MISSES’ VEST, JACKET AND PANTS

V9377  Misses Jacket and Belt

Butterick

B6691 Misses Jacket and Jumpsuit

B6680 Misses Dress

B6685 Misses Top and Sash

McCalls

M7942  Misses’, Children’s and Girls’ Top, Skirt, Shorts and Pants

Indy Pattern Companies

For this list I just linked you to a handful of company websites because many of them only have a handful of patterns on their site.  Many of which are stylish, very easy and beginner friendly.  Its worth the extra effort to spend time on their sites.  They often have really great blogs and tutorials in addition to their shop.

Paper Theory Patterns

Style Sew Me

Closet Case Patterns

Megan Nielsen Patterns

Friday Pattern Company

MimiG Style

Rosy Peña Patterns

That’s it!  A nice round up of some great and easy sewing patterns to help you build your handmade summer wardrobe without too much fuss.  Have a great 4th of July holiday everyone! Catch you next week…

blog signature